Solarfam
4 x SolarFam Monocrystalline 200Wp (800Wp)
4 x SolarFam Monocrystalline 200Wp (800Wp)
Couldn't load pickup availability
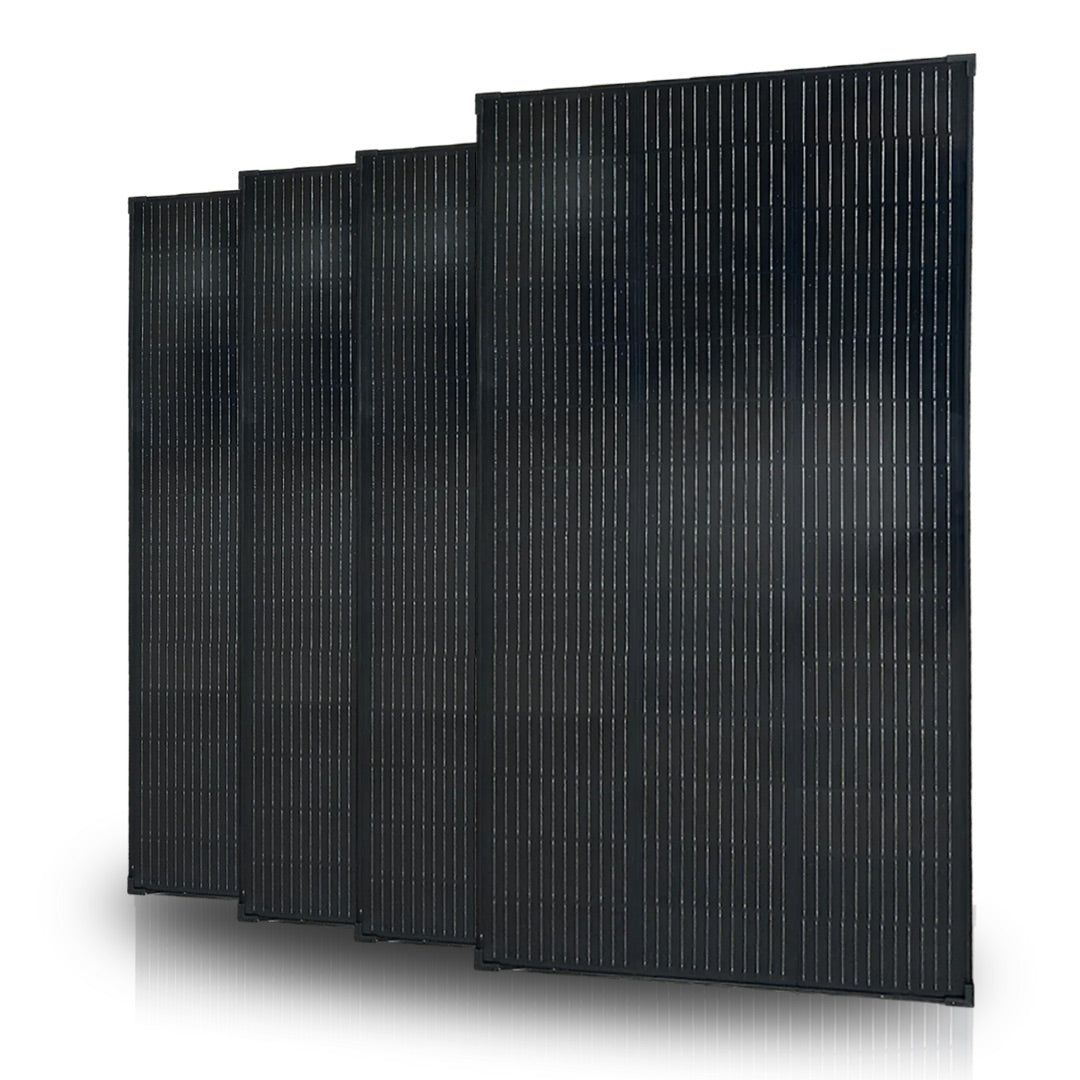
This bundle consists of 4 × SolarFam Monocrystalline 200Wp solar panels, totaling 800Wp solar power. This is a large solar panel kit for campers, expedition vehicles, truck campers, boats, and other off-grid installations where a lot of roof space is available.
With 800Wp, you can recharge a lot of energy, especially in spring and summer. This bundle is interesting for people who want to use heavier off-grid consumers, such as e-bike chargers, laptop chargers, and electric cooking. The battery, inverter, cabling, fuses, and additional charging sources must also match the overall system.
Why this 800Wp bundle? ▾
- 800Wp total power: composed of 4 identical SolarFam 200Wp solar panels.
- Monocrystalline cells: suitable for high yield on available roof space.
- High efficiency of 22%: efficient panel for campers, boats, and off-grid systems.
- Bundle discount: more cost-effective than purchasing the same panels separately.
- For larger installations: interesting for electric cooking, e-bike charging, living in a camper, or longer off-grid periods.
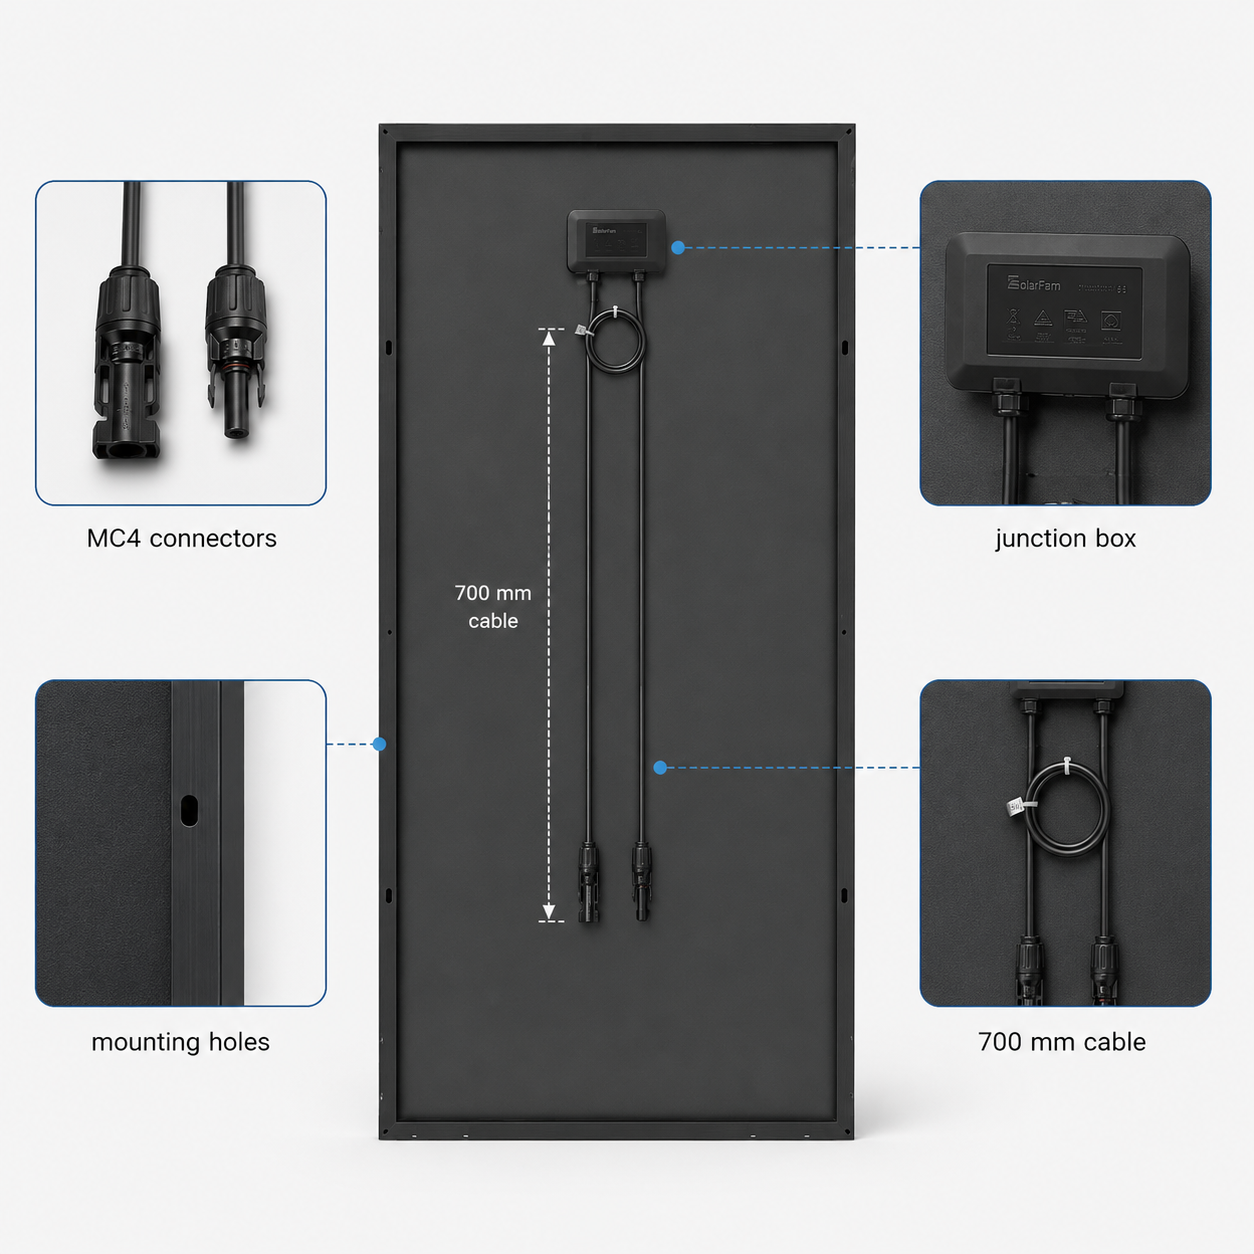
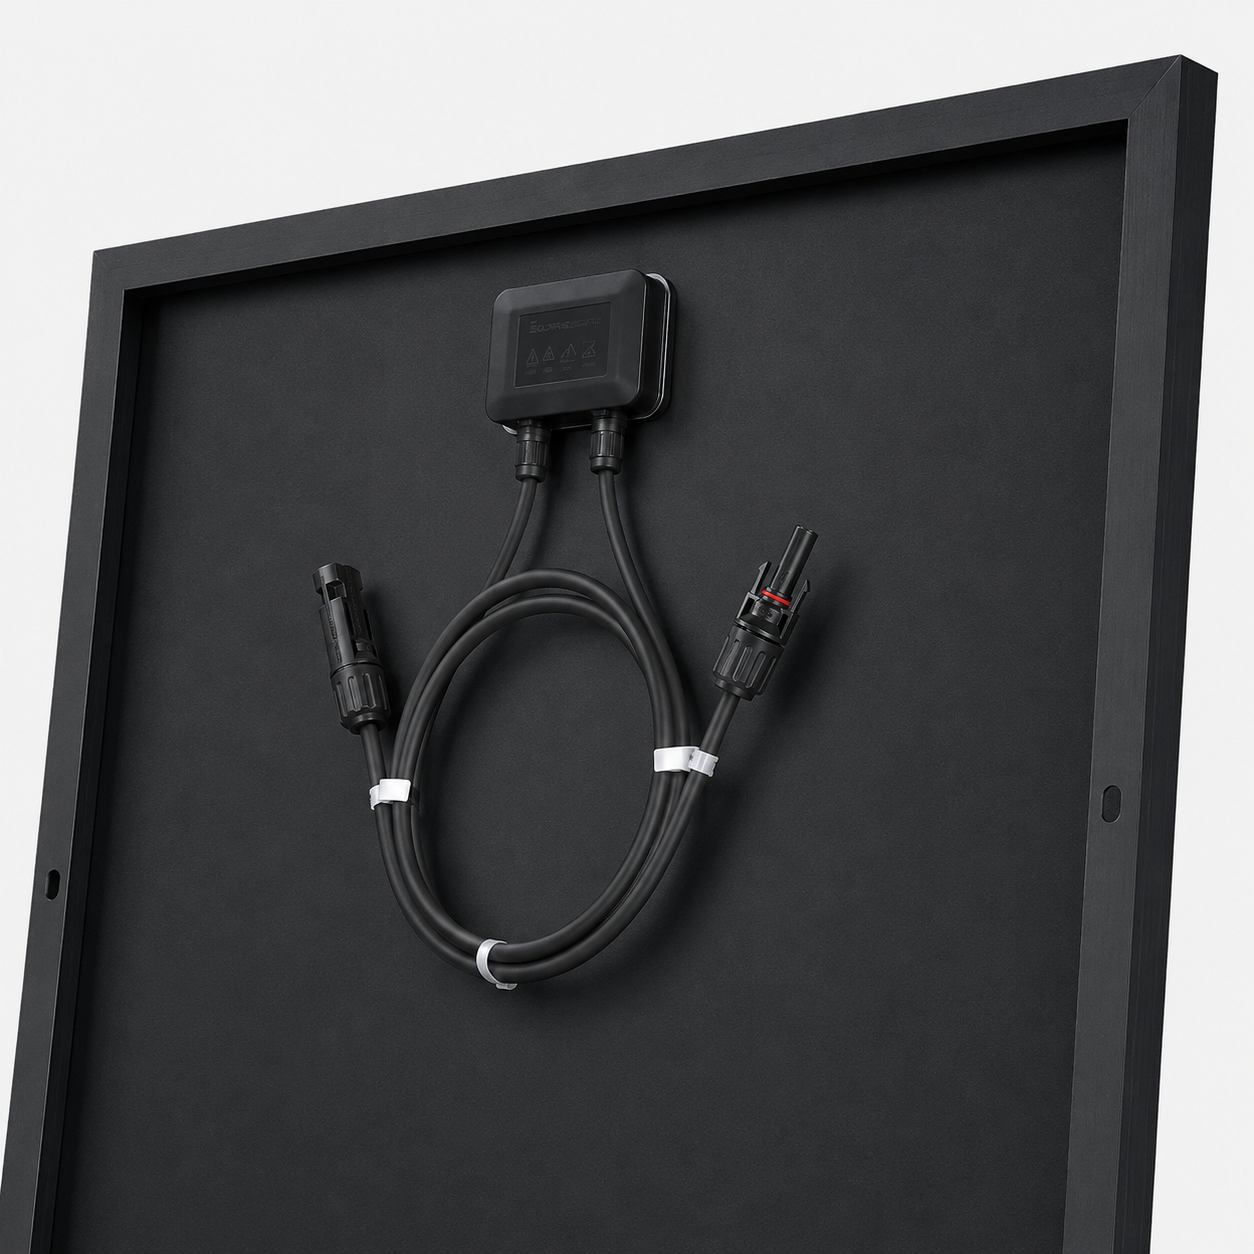
- MC4-compatible connections: easy to combine with standard solar cables, MC4 splitters, and MPPT charge controllers.
Specifications & dimensions ▾
800 Wp
4 × SolarFam Monocrystalline 200Wp
200 Wp
SZ-200
Monocrystalline
22%
8.21 A
24.36 V
28.56 V
8.71 A
500 V
0 to +3%
700 mm / 2.5 mm²
MC4 / MC4 compatible
Aluminum frame / glass / EVA / backsheet
IP67
1530 × 670 × 30 mm
10.2 kg net
approx. 40.8 kg net, excluding mounting material
-40°C to +80°C
5 years
Four panels of this size do not fit on every camper roof. This bundle is particularly interesting for larger or more unique camper conversions, such as truck campers, expedition vehicles, spacious L4 projects with few roof obstructions, or off-grid projects with ample available mounting surface.
How to safely connect 4 panels? ▾
For this bundle of 4 × 200Wp, we recommend a 2S2P connection: two panels in series, another two panels in series, and then these two series strings are combined in parallel. For camper applications, this is the most logical balance between sufficient panel voltage, limited current, and safe DC operation.
Recommended: 2 panels in series + 2 panels in series, then in parallel
Create two identical series strings of two panels each. Then, combine these two series strings in parallel using MC4 parallel connectors 2-in-1. From there, one positive and one negative cable run indoors via the solar cable set, towards the MPPT charge controller.
- Per series string, you get approximately 2 × 28.56V = 57.12V open-circuit voltage under standard test conditions.
- Even in cold weather, this voltage remains much more manageable than with four panels in series.
- The current remains much lower than if you were to connect all four panels in parallel.
- This setup is suitable for both 12V and 24V battery installations, provided the correct MPPT charge controller is used.
- Preferably create two strings with panels that receive similar light conditions.
Do not connect all four in parallel
One panel has a short-circuit current of 8.71A. With four panels in parallel, the current can reach approximately 4 × 8.71A = 34.84A. This is too high for standard MC4 connectors and not the correct way to connect this set.
Do not connect all four in series
Four panels fully in series result in an open-circuit voltage of 4 × 28.56V = 114.24V under standard test conditions. At low temperatures, this voltage increases even further. Even if an MPPT controller can technically handle 150V input voltage, we do not recommend this high DC voltage for camper applications. Ideally, with such mobile installations, you should stay below approximately 80V DC. Therefore, we do not recommend a 4S connection here, but rather 2S2P.
Which charge controller suits 4 × 200Wp? ▾
For this bundle, with a 12V battery installation, we recommend the Faraday SmartSolar MPPT 150/60. This controller has sufficient capacity for a large 12V solar panel set and is a better match for 800Wp than a 40A charge controller.
Are you using a 24V battery installation? Then we recommend the Faraday SmartSolar MPPT 100/40. At 24V, the charging current is lower than at 12V, which means the 40A variant fits this set well, provided the panels are connected appropriately.
- Recommended for 12V: Faraday SmartSolar MPPT 150/60.
- Recommended for 24V: Faraday SmartSolar MPPT 100/40.
- Bluetooth app: convenient for viewing charging status, yield, and settings via your phone.
- Built-in display: direct reading without a phone.
- Suitable for multiple battery types: e.g., AGM, gel, lead-acid, or LiFePO4.
Connecting MPPT to battery ▾
With 800Wp of solar power, the battery side of the charge controller must be carefully implemented. The correct cable diameter and fuse depend on the chosen MPPT, the system voltage, and the cable length between the MPPT and the battery.
- For a 12V system with a 60A MPPT, robust battery cabling is essential. Match cable diameter and fuse to the cable length and installation setup.
- For a 24V system with a 40A MPPT, we usually recommend 16mm² battery cable between the MPPT and the battery, depending on cable length.
- Place an appropriate fuse as close as possible to the positive terminal of the battery or positive distributor.
- Use an appropriate MIDI fuse holder.
- Use appropriate crimp cable lugs for the fuse holder, MPPT, and battery connection.
Other SolarFam 200Wp bundles ▾
Do you want less solar power or does this set not fit well on your roof? This SolarFam 200Wp panel is available as a single panel and as a bundle with multiple panels. A bundle discount applies when purchasing multiple panels at once.
What is this bundle suitable for? ▾
This 800Wp bundle is suitable for larger camper installations where you want to make maximum use of the available roof space. Think of expedition vehicles, truck campers, large bus campers, or off-grid projects with many electrical consumers.
- Suitable for basic consumers such as compressor refrigerators, LED lighting, water pumps, fans, and phone chargers.
- Interesting for extensive laptop use, e-bike charging, and other consumers via an inverter.
- Can contribute to off-grid electric cooking, provided the battery, inverter, wiring, and protection are adapted accordingly.
- Suitable for people living in their camper who want to utilize as much available solar surface as possible.
- Especially interesting for winter use, as you need as much roof space as possible then to achieve usable output.
- Can be combined with a complete off-grid system with a lithium battery, MPPT, alternator charger, and/or shore power charger.
Mounting on camper roof ▾
Each panel is 670 mm wide. For mounting on a flat camper roof, you can use the black 68cm spoilers. For bus campers, we usually recommend aluminum Z-profiles, set of 6 pieces per panel. These are often easier to install on a roof with ribs, curvature, or limited flat mounting surfaces.
- Flat roofs: plastic spoilers are especially suitable for flat roofs, such as in (semi)integrated campers or behind the alcove of an alcove camper.
- Panel lengthwise: if you can place the panel lengthwise on the roof, spoilers at the front and back are often a neat and aerodynamic solution.
- Bus campers: for roofs with ribs or a slight curve, aluminum Z-profiles are usually more practical than long plastic spoilers.
- Thoroughly degrease the roof and follow the instructions for the adhesive, sealant, and primer used.
- Use an appropriate roof entry for the solar cables.
- Secure cables on the roof firmly with UV-resistant adhesive bases and tie-wraps.
- Prevent cables from chafing, kinking, or moving freely while driving.
- Boat: on a suitable flat deck, use plastic corner brackets.
What else do you usually need? ▾
- Plastic corner brackets for mounting on a suitable flat boat deck
- Spoilers black 68cm for flat roofs, or aluminum Z-profiles set of 6 pieces per panel for bus campers and roofs with ribs/curvature
- Roof entry for solar cables
- Solar cable set 4mm² indoors
- MC4 parallel connectors 2-in-1 for 2S2P connection
- Faraday SmartSolar MPPT 150/60 for a 12V battery installation
- Faraday SmartSolar MPPT 100/40 for a 24V battery installation
- Battery cables, fuse holder, fuse, and cable lugs suitable for the chosen MPPT and cable length
Want to put together a complete set? Send us a photo of your roof and your current electrical setup, and we'll help you with practical advice.
Common mistakes ▾
- Connecting solar panels directly to a battery without an MPPT charge controller.
- Connecting four panels in parallel, causing the current to become too high for standard MC4 connectors.
- Connecting four panels entirely in series to a 100V MPPT controller.
- Connecting four panels entirely in series, even if the MPPT controller can technically handle a higher input voltage.
- Incorrectly setting up 2S2P, for example, with unequal strings or wrongly placed MC4 splitters.
- Using a too small or unsuitable charge controller for 800Wp solar power.
- Using too light a battery cable between the MPPT and the battery.
- Not placing a fuse close to the battery on the positive side of the MPPT connection.
- Combining panels with different voltages or powers without checking the specifications.
- Leaving cables loose on the roof, with the risk of chafing, leakage, or cable breakage.
- Insufficiently sealing the roof feed-through or using the wrong sealant/primer for the roof material.
FAQ ▾
Which MPPT charge controller do you recommend for 4 × 200Wp?
For a 12V battery installation, we recommend the Faraday SmartSolar MPPT 150/60. For a 24V battery installation, we recommend the Faraday SmartSolar MPPT 100/40, with appropriate panel wiring.
What is the best way to connect four panels?
We recommend 2S2P: two panels in series, another two panels in series, and then combining the two series strings in parallel with MC4 parallel connectors 2-in-1. This keeps the voltage manageable and prevents the current from becoming too high for standard MC4 connectors.
Why not all parallel or all in series?
Four panels in parallel can collectively provide too much current for standard MC4 connectors. Four panels in series, on the other hand, produce too high a DC voltage for a safe and practical camper installation. Even with an MPPT with 150V input voltage, we therefore do not recommend 4S wiring, but 2S2P.
Does this bundle fit a standard camper van?
That depends heavily on the roof layout. Four panels of 1530 × 670 mm require a lot of space. This is mainly a set for larger camper conversions, truck campers, expedition vehicles, or spacious projects with few roof obstructions.
Can I cook electrically with 800Wp?
The solar panels can help to recharge a lot of energy, especially in the summer. However, electric cooking demands a lot from the entire installation. You will also need sufficient battery capacity, a suitable inverter, good cabling, fuses, and preferably additional charging sources.
Is 800Wp suitable if I live in my camper van?
For living in a camper van, a large solar panel area is advisable, especially if you want to be off-grid even in less sunny periods. However, winter yield remains limited. Therefore, combine this set with sufficient battery capacity and other charging sources, such as an alternator charger or shore power charger.
Which mounting brackets or spoilers fit these panels?
Because the panels are 670 mm wide, the 68 cm black spoilers are a good fit for mounting on a flat roof. For camper vans, we usually recommend the aluminum Z-profile set of 6 pieces per panel, as these are easier to place on roofs with ridges, curves, or limited flat mounting surfaces.
Why four smaller panels instead of one large solar panel?
One large solar panel is often cheaper per watt, but on a camper roof, that is not always the best choice. With four smaller panels, you are more flexible in arranging your roof, for example around roof hatches, vents, or rails. Additionally, due to their shorter and narrower frames, smaller panels are often stiffer than large household panels and are therefore less vulnerable in practice on vehicles.
Deel